Getting Started With Hugo in Windows and Free Hosting with Netlify

This is a guide for windows. There are multiple ways to install Hugo in a Windows PC. I prefer Chocolatey. To install, Open PowerShell or Command prompt with elevated privileges. Copy the following and paste in the terminal.
1
choco install hugo
To check whether the installation is successful,
1
hugo version
it should output something like this,
1
2
$ hugo version
Hugo Static Site Generator v0.78.1/extended windows/amd64 BuildDate: unknown
if you are planning to use Sass for CSS, hugo-extended is needed. To install hugo-extended
1
choco install hugo-extended
If you prefer installing with Windows installation binaries, go to Hugo GitHub and grab the latest version.
Now to creating Hugo site. To create use
1
hugo new site new-hugo-site
It will create a directory new-hugo-site (replace it with your preference) and populates with all necessary files. Output should look something like this
1
2
3
4
5
6
7
8
9
10
11
12
13
14
>hugo new site new-hugo-site
Congratulations! Your new Hugo site is created in %user%\new-hugo-site.

Just a few more steps and you're ready to go:

1. Download a theme into the same-named folder.
   Choose a theme from https://themes.gohugo.io/ or
   create your own with the "hugo new theme <THEMENAME>" command.
2. Perhaps you want to add some content. You can add single files
   with "hugo new <SECTIONNAME>\<FILENAME>.<FORMAT>".
3. Start the built-in live server via "hugo server".

Visit https://gohugo.io/ for quickstart guide and full documentation.
Now, we need theme, at least barebones one to get started. In the quick start guide of Hugo, it suggests use of Ananke. Go to Ananke GitHub. Download the Repo and extract the archive into new-hugo-site/themes. To enable the theme add the following line to the config.toml.
1
theme: "ananke"
Essentially, Hugo site is ready. To generate static site
1
hugo serve -D
here -D flag is for viewing draft posts.
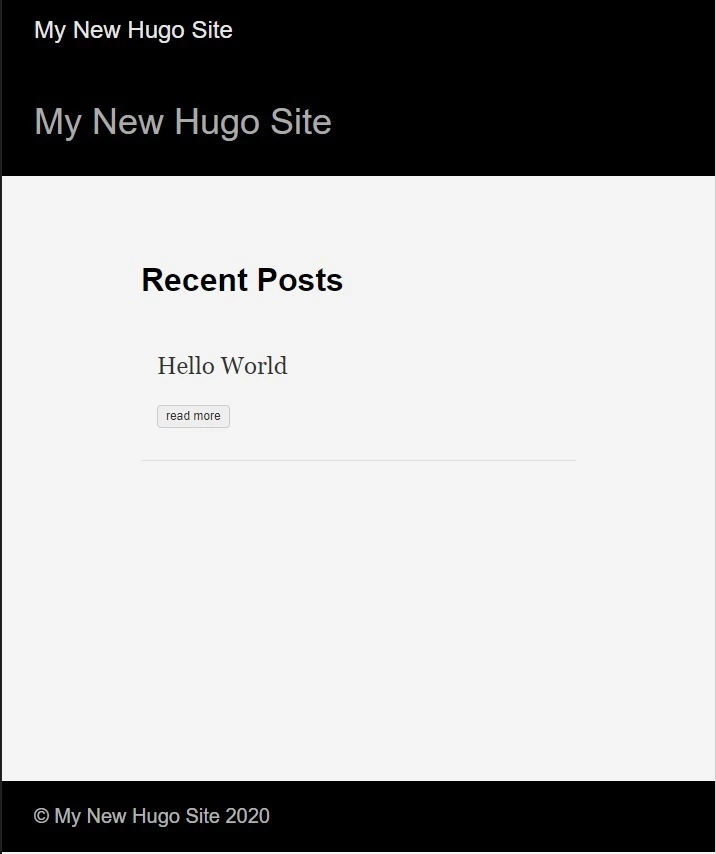
To add blog posts to Hugo
1
hugo new posts/hello-world.md
Hugo now creates new file names hello-world.me. it should look something like this
1
2
3
4
5
---
title: "Hello World"
date: 2020-11-12T19:23:10+05:30
draft: true
---
To publish the post just remove or comment the draft tag. Hugo uses markdown to generate posts. All you’ve to do is start typing.
Hugo can be hosted with Netlify for free. To proceed with that create a repo on GitHub or BitBucket.
1
2
3
4
5
6
git init
git remote add origin [email protected]:kdpuvvadi/new-hugo-site.git
git branch -M main
git add .
git commit -m "my first commit"
git push -u origin master
Repo is ready. Now open Netlify and create an account. After completion of signup, connect your GitHub account to Netlify.
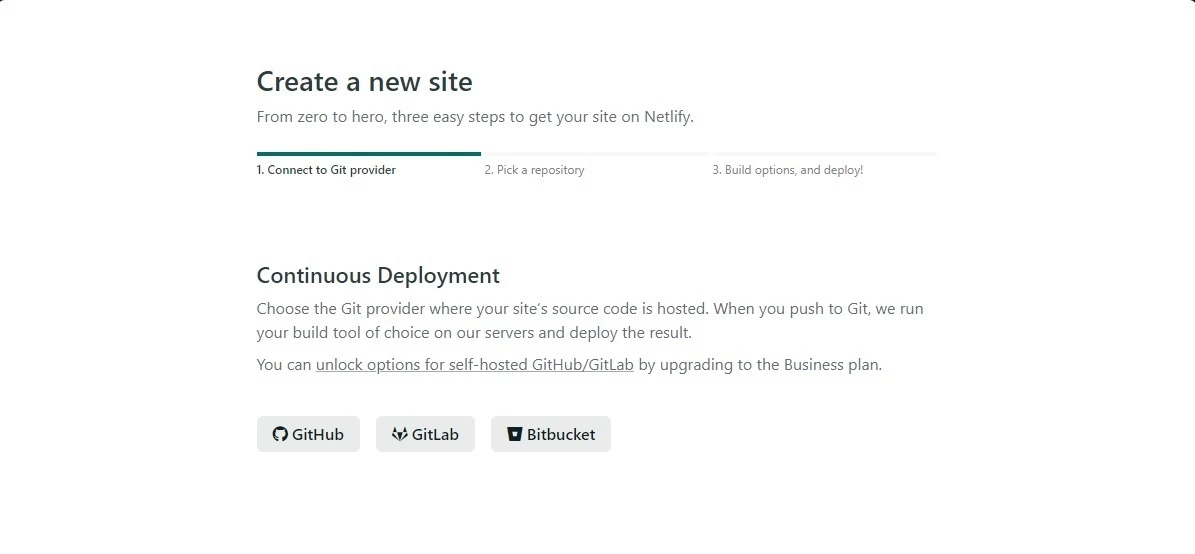
Now, connect GitHub and Select your Repo and keep the remaining default.
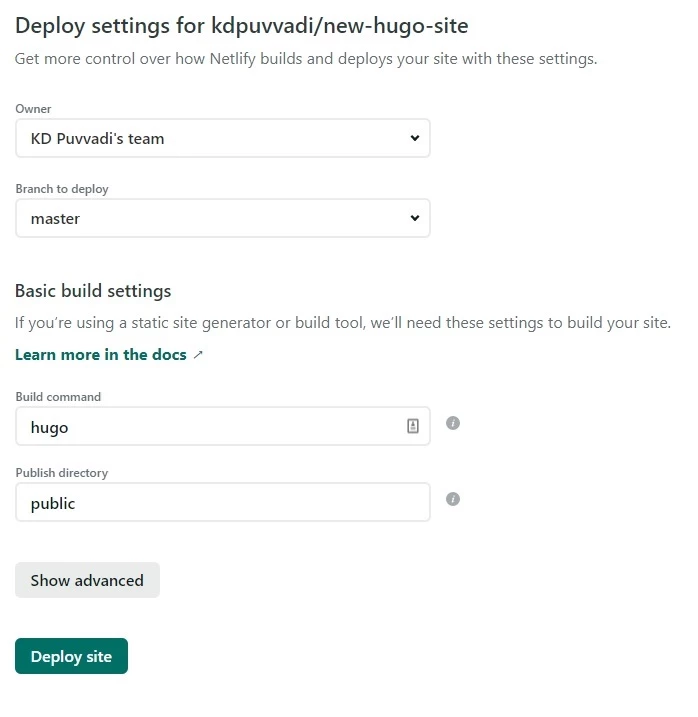
Click on Deploy Site. Now, Netlify grabs the repo’s Master branch and builds the Site. Keep an Eye on build log. If the build fail, check what’s went wrong. For me I’ve to change the build command to following.
1
hugo --gc --minify
And added the following Environment Variable.
1
HUGO_VERSION 0.77.0
To added Env variables, go to Site settings > Build & Deploy > Environment. Set the Key HUGO_VERSION and it’s value to 0.77.0
You can visit published site HERE