Access Home Assistant from anywhere securely with DuckDNS, Let's Encrypt and NGINX
we’ve setup Home Assitant previously. Without static IP, it’s hard to access Home Assistant instance out of the home without hassio cloud.But it’s a subscription service. One of the reason one might choose Home Assistant is to avoid subscription services from a lot of providers.
DuckDNS Intro
Problem without static IP is, ISP’s assigns different IP from their pool every time home router restarts or after certain time. assigning DNS to constantly changing IP becomes hassle. DuckDNS provides DNS service without a separate Domain and difficult setups. Simple signup with Google or five sign in services. There are certain limitations with DuckDNS though, it only allows five subdomain registration for free users. One is sufficient for Home Assistant setup.
DuckDNS Signup
Visit DuckDNS and sing up with with Google, Twitter, GitHub, Reddit or persona. After sing in, enter the desired subdomain name e.g. myhome.duckdns.org. DuckDNS grabs current public IP and assigns it to the subdomain. You should note down token number provided here.
DuckDNS Add-on
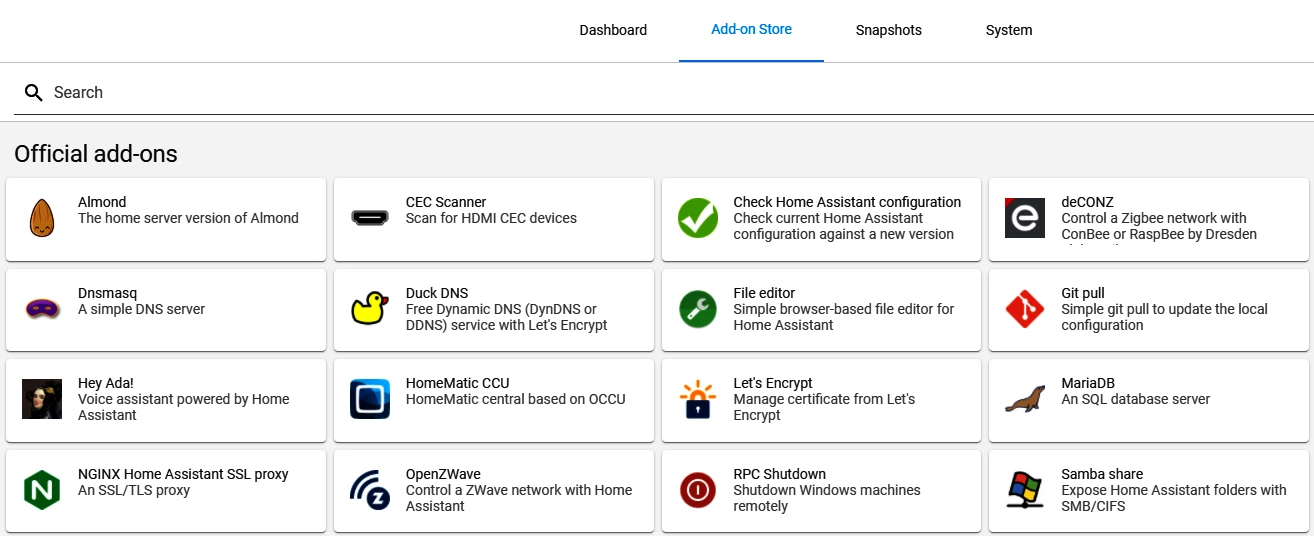
Open Home Assistant instance on your browser of choice(192.168.1.123:8123). Go to Supervisor > Add-on Store and Select DuckDNS Add-on and Click install. Open configuration Tab on top paste the following
1
2
3
4
5
6
7
8
9
lets_encrypt:
  accept_terms: true
  certfile: fullchain.pem
  keyfile: privkey.pem
token: token-from-duckdns
domains:
  - subdomain.duckdns.org
aliases: []
seconds: 300
Note:- Replace token and subdomain with subdomain from DuckDNS and token noted down in last step.
Go to Info tab and start the service. Don’t forget to enable Start onboot and Watchdog. DuckDNS now works in the background and installs SSL certificates from Let's Encrypt.
NGINX
To access Home Assistant from outside of home, Nginx proxy is need to route the traffic from the outside. To install the Nginx Add-on go to Supervisor > Add-on Store Select NGINX Home Assistant SSL proxy. Now, go to Configuration and replace with following
1
2
3
4
5
6
7
8
9
domain: subdomain.duckdns.org
certfile: fullchain.pem
keyfile: privkey.pem
hsts: max-age=31536000; includeSubDomains
cloudflare: false
customize:
  active: false
  default: nginx_proxy_default*.conf
  servers: nginx_proxy/*.conf
Note:- Replace token and subdomain with subdomain from DuckDNS.
Click save and Go to to info Tab and Star the Add-on. Don’t forget to enable Start onboot and Watchdog. It may take sometime before it enables connection. Status of the service can be checked at Logs Sections. After everything completed, restart the Home Assistant instance. Now try to visit the DuckDNS subdomain with added https. e.g myhome.duckdns.org. It should be asking redirected login window.
Conclusion
To access it securely only enable 443 port in the Network section of Nginx Configuration. 443 port forward should be done in your network router to allow outside connection to HASS. Port forward isn’t mentioned here. reason being, there are every other combination of routers and network configurations are out there. Just search *Port forward **your router vendor** model*`. Please keep in mind that, simple misconfiguration can cause huge damage to you and your network. please make sure you know what you are doing. Au revoir.